How to Create an Access Panel in Drywall: A Step-by-Step Guide
Making an access panel in drywall is a great way to gain access to the interior of a wall for plumbing or electrical repairs. This process involves cutting a hole in the drywall, framing the hole, attaching the access panel, and finishing the edges. The following steps will provide a detailed overview of how to make an access panel in drywall:
1. Mark and cut out a rectangle or square shape that corresponds to the size of the access panel you are installing.
2. Frame out the hole with 2×2 boards and secure with screws.
3. Measure and cut out an appropriate piece of plywood or hardboard for your access panel.
4. Attach this board to the frame with screws.
5. Cut out any necessary holes in your board to accommodate pipes or wiring, if needed.
6. Secure all edges with putty tape and joint compound, ensuring that all seams are sealed against moisture and air infiltration.
7. Place additional joint compound around the perimeter of your access panel for a finished look and let it dry overnight before painting it with a matching wall color or texture finish as desired.
Plumbing Basics
Understanding the basics of plumbing is essential for any DIY plumbing project. Plumbing systems consist of pipes, fittings, and drainpipes that are responsible for carrying water to and from different areas of your home. Pipes are generally made from materials such as copper or PVC, while fittings are connected through various methods such as soldering or using compression fittings. Drainpipes then carry the wastewater away from your home to a sewer line or septic tank. Understanding how these components work is important for any plumbing project.
Installing a Plumbing Access Panel in Drywall
When you need to access a plumbing system behind drywall, an access panel is necessary to gain access. Creating an access panel in drywall involves gathering the necessary tools and materials, marking out where the panel will go, and cutting holes for the access panel on drywall. Then the frame needs to be secured to the wall before fitting a cover plate over it.
Gathering the right tools and materials is key when tackling this project. You will need a number of items such as saws, drill bits, screws, drywall anchors and screws, a jigsaw blade, a measuring tape, and a pencil or marker. Depending on your individual project you may also require additional items like plywood sheets or caulk sealant.
The next step is to mark out where the access panel will go on the wall with a pencil or marker so you know where to cut. When marking out your access panel area it’s important to make sure that there’s enough space around it for you to be able to work comfortably once installed – this will help you avoid cutting too big an area which could weaken the structural integrity of your wall.
Once you’ve marked out your desired area, start cutting holes into drywall with either a saw or jigsaw blade depending on how thick your walls are – thicker walls will require more powerful tools like jigsaws as saws cannot get through them easily enough. Make sure that you stay within your marked-out area when cutting so that you don’t accidentally cut too much of your wall away!
After cutting out an appropriate size hole in the drywall for your access panel frame, secure it into place by screwing into place using appropriate anchors if necessary – this will ensure that it remains firmly secured in place even when under pressure from being opened and closed regularly throughout its lifetime!
Installing A Cover Plate For The Access Panel
Once you’ve secured the frame into place it’s time to add some finishing touches by installing a cover plate over it – this can be done by simply screwing into place once everything fits properly first! Before installation however make sure all edges fit snugly together so that there aren’t any gaps between them which could let water in – if they do not fit properly then consider sanding down edges until they do before continuing!
Finishing Up After Installing An Access Panel In Drywall
Finally when all else is said and done there are still some final touches which should be taken care of before calling this project finished! Caulk around the cover plate provides waterproofing protection which can help prevent water damage over time while sealing any gaps around the frame helps ensure heat retention within rooms as well as air tightness so no drafts come through – both highly important factors! Additionally reinforcing walls behind panels with plywood sheets can help make sure they remain sturdy even under pressure from regular opening/closing throughout its lifetime – something which should never be overlooked when installing any type of plumbing system! Lastly check sides of panels for wobbling before finishing up as slight adjustments may need made if found otherwise all should be good once everything fits snuggly together without any gaps in between edges!
Introduction
Plumbing is an essential part of a home and it requires regular maintenance to keep it functioning properly. It is important to know how to make an access panel in drywall if you are going to be doing any work on your plumbing system. An access panel allows you to get access to the pipes behind the walls and ceilings of your home, which can be very useful when it comes time for repairs or maintenance. In this article, we will discuss the steps necessary for making an access panel in drywall.
Steps
The first step in making an access panel in drywall is to measure the area where you need it. You will need to decide how big the panel needs to be and where it will be located. Once you have these measurements, use a level and a pencil to draw a square on your wall that corresponds with the size of the panel that you need.
Cutting The Drywall
Once you have marked off where your panel will go, use a keyhole saw or drywall saw to cut along the lines that you drew on the wall. Be sure to wear safety glasses and ear protection while doing this step as there could be debris flying around during cutting. Cut slowly and carefully as this will help ensure that there are no jagged edges left behind after cutting through the drywall.
Installing The Access Panel
After you have cut out the hole for your access panel, place it into position on the wall. Secure it with screws or nails into place by drilling them through pre-drilled holes on each side of the frame. Once secured, use joint tape along all four sides and then cover with joint compound or spackle until smooth, ensuring that all sides of the frame are evenly covered with compound or spackle so that no gaps remain visible when finished drying. Allow ample time for drying before painting over it with a matching paint color so that it blends seamlessly into its surroundings.
Conclusion
Making an access panel in drywall isn’t difficult if you follow these steps correctly and take all safety precautions seriously while doing so. Doing this yourself can save money compared to having someone else do it for you, but if you feel uncomfortable or unsafe attempting such a task then always call in a professional plumber instead!
FAQ & Answers
Q: What tools and materials are needed to install a plumbing access panel in drywall?
A: To install a plumbing access panel in drywall, you will need the following tools and materials: a utility knife, a jigsaw or drywall saw, drywall screws and anchors, wood screws, plasterboard tape, silicone caulk and plywood.
Q: How do I mark out the access panel?
A: To mark out the access panel on the wall, first measure the size of the frame that needs to be cut out. Then use a pencil to trace around the perimeter of where the frame should be located.
Q: How do I cut holes for the access panel on drywall?
A: To cut holes for the access panel on drywall, use either a utility knife or jigsaw or drywall saw. Carefully cut along your traced lines until you have removed enough material for the frame to fit into place.
Q: How do I prepare and attach the cover plate to frame?
A: Before attaching the cover plate to frame, make sure it fits properly by checking all corners are flush with each other. Once you’re sure everything fits correctly, use wood screws to secure it onto your frame.
Q: What should I do after installing an access panel in drywall?
A: After installing an access panel in drywall, there are several finishing steps that need to be taken. These include caulking around the cover plate for waterproofing purposes; sealing gaps around the access panel frame to ensure heat and air tightness; reinforcing the wall behind the access panel with plywood sheets; and checking all sides of the access panel for wobbling before finishing up.
In conclusion, making an access panel in drywall is a relatively simple process that can be completed by the average homeowner with basic carpentry skills. Although the exact process may vary depending on your particular application, the steps outlined in this article should provide a general idea of what is involved. With a little patience, you can easily create an access panel that will provide easy access to your plumbing system.
Author Profile
-
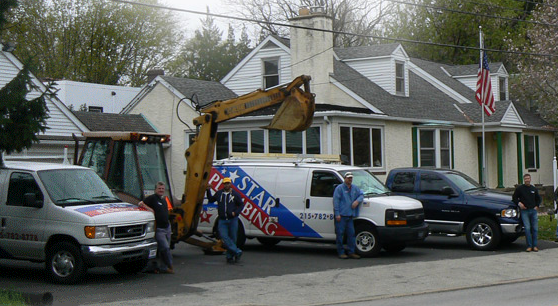
Star Plumbing, located in Elkins Park, PA, is a full-service plumbing company owned and operated by Mitchell Gordon. Since its inception, Star Plumbing has been providing its customers with reliable, quality plumbing services.
The Star Plumbing website offers informative articles on DIY plumbing and plumbing equipment, offering readers helpful advice and tips on how to take care of their own plumbing needs. This is a great resource for those who are looking to tackle a plumbing project themselves, as it provides useful information and advice on how to safely and successfully complete a plumbing job. Additionally, the website provides detailed descriptions of the various plumbing tools and equipment that are available, as well as detailed instructions on how to use them.
Star Plumbing’s website is a great resource for anyone with plumbing needs. Whether a customer is looking for advice on how to take care of their own plumbing or to schedule service from Star Plumbing, the website offers helpful advice and information for all their plumbing needs.
Latest entries
- April 12, 2024Plumbing Equipment And AccesoriesI Tested And Ranked The Best 10 Inch Rough In Round Toilet: And Here’s What I Found
- April 12, 2024Plumbing Equipment And AccesoriesI Tested And Ranked The Best Stone That Cleans Toilets: And Here’s What I Found
- April 12, 2024Plumbing Equipment And AccesoriesI Tested And Ranked The Best Heat Tape For Plumbing: And Here’s What I Found
- April 12, 2024Plumbing Equipment And AccesoriesI Tested And Ranked The Best Kaboom Toilet Bowl Tablets: And Here’s What I Found